
Migrate external shortcuts
When migrating models from PowerDesigner to Hackolade Studio, users typically reverse-engineer multiple PowerDesigner files that are logically linked together. In PowerDesigner, these links are implemented using external shortcuts, meaning objects in one model reference objects physically defined in another model file. In Hackolade Studio, we call those references to existing objects (like entities or tables) in the same model, or a different saved data model, allowing reuse without duplication.
During migration, these cross-file dependencies must be reconstructed so they can be used going forward. These instructions walk you through the process to safely handle the conversion of PowerDesigner external shortcuts into Hackolade Studio references, even if the referenced model has not yet been reverse-engineered.
Identifiable placeholders
When Hackolade Studio encounters an external shortcut during reverse-engineering of a PowerDesigner data model file, it does not try to resolve, load, or bind that shortcut to another model. Instead, Studio creates, for each external shortcut, a standalone placeholder object that represents the external shortcut, without introducing any dependency or linkage to other models.
Once all PowerDesigner files have been imported into Studio, the placeholders can be easily identified and manually connected to the corresponding entities in other Studio models. Although this requires a small amount of manual work, it is a one-time effort inherent to migration and ensures a controlled, predictable, and stress-free transition.
Note: this design choice avoids to force users into a specific import order, to trigger chained file loads, or to risk having to deal with circular dependencies between PowerDesigner models. Each file can be reverse-engineered independently, in any order.
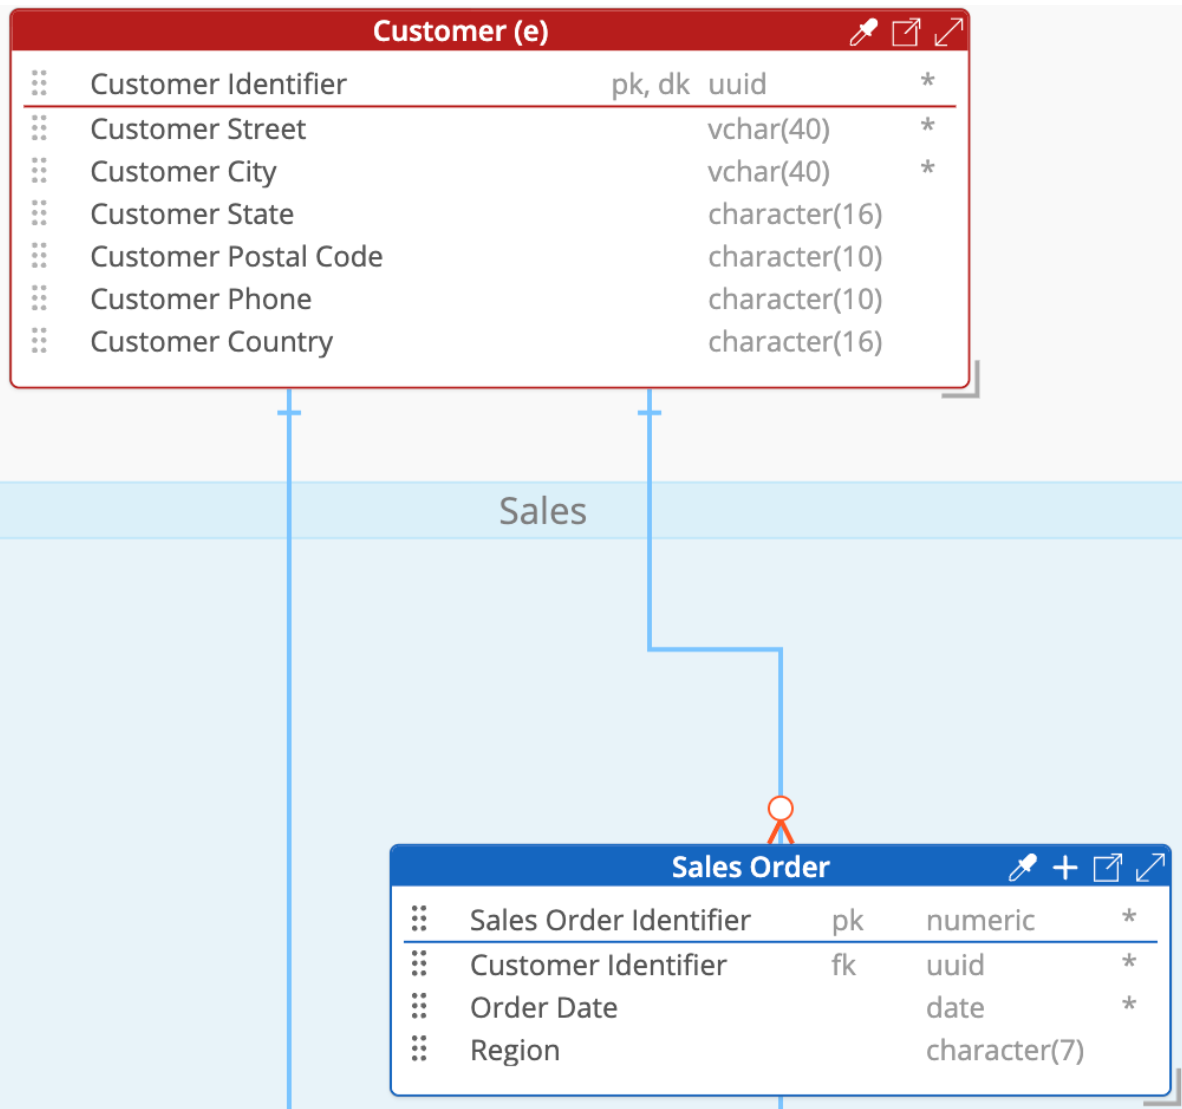
An important advantage of this approach is that relationships are already preserved at the model level. Placeholders can participate in relationships with other objects during reverse-engineering, allowing the overall structure to remain intact. After reconnecting the placeholder to its external definition, the user only needs to finalize the relationship details, such as defining the corresponding foreign key relationship if applicable.
The full migration process, including when and how to reconnect external shortcuts, is described step-by-step in the recommended migration workflow below.
Identify external shortcut placeholders after reverse-engineering
During the reverse-engineer process, a warning is displayed indicating that external shortcuts were detected and converted into placeholder entities:
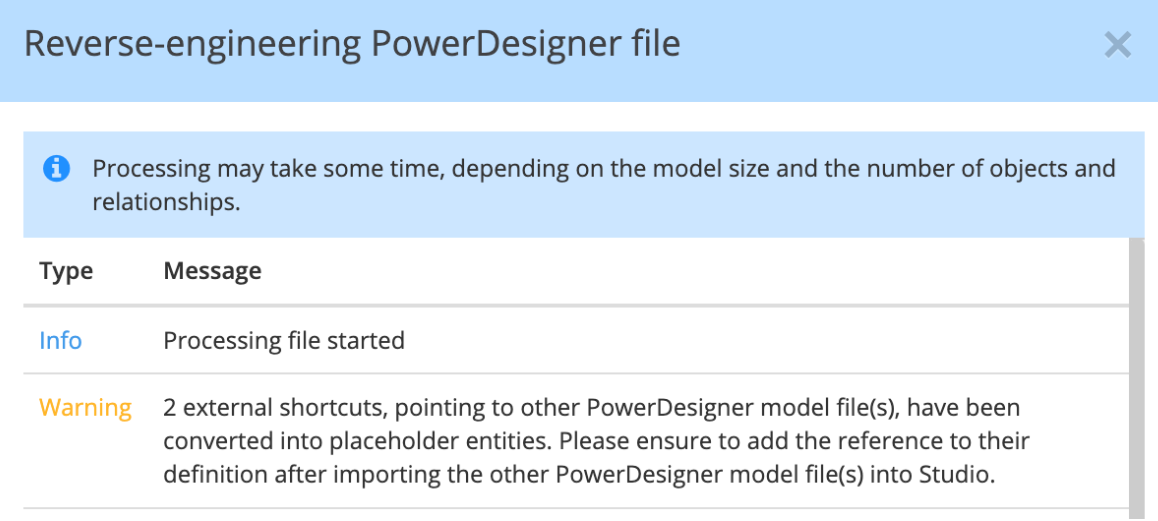
This information is also captured in the log file.
Once in the model, placeholders can be identified in several ways:
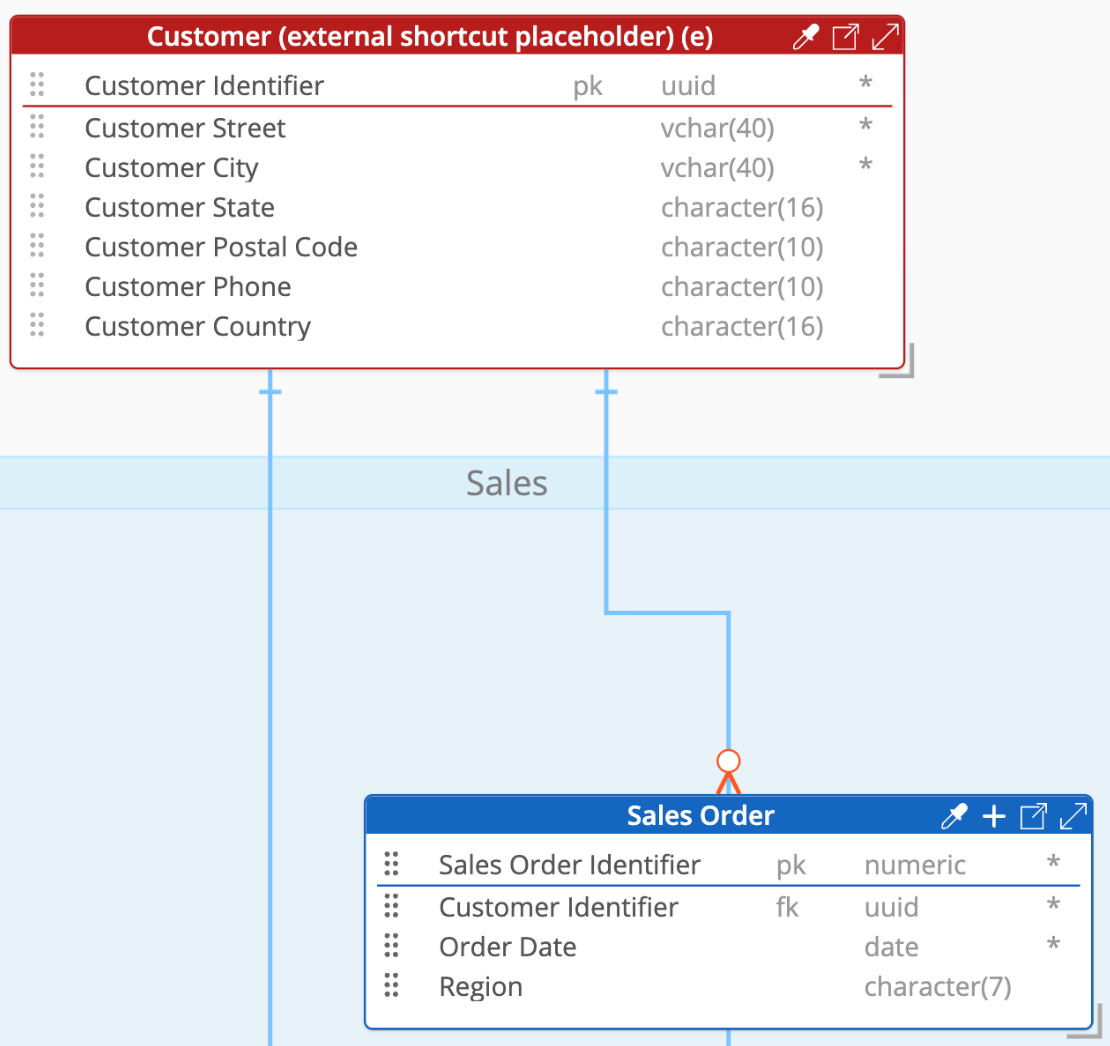
- in the ERD and Graph Diagram, they are visually highlighted (displayed in red)
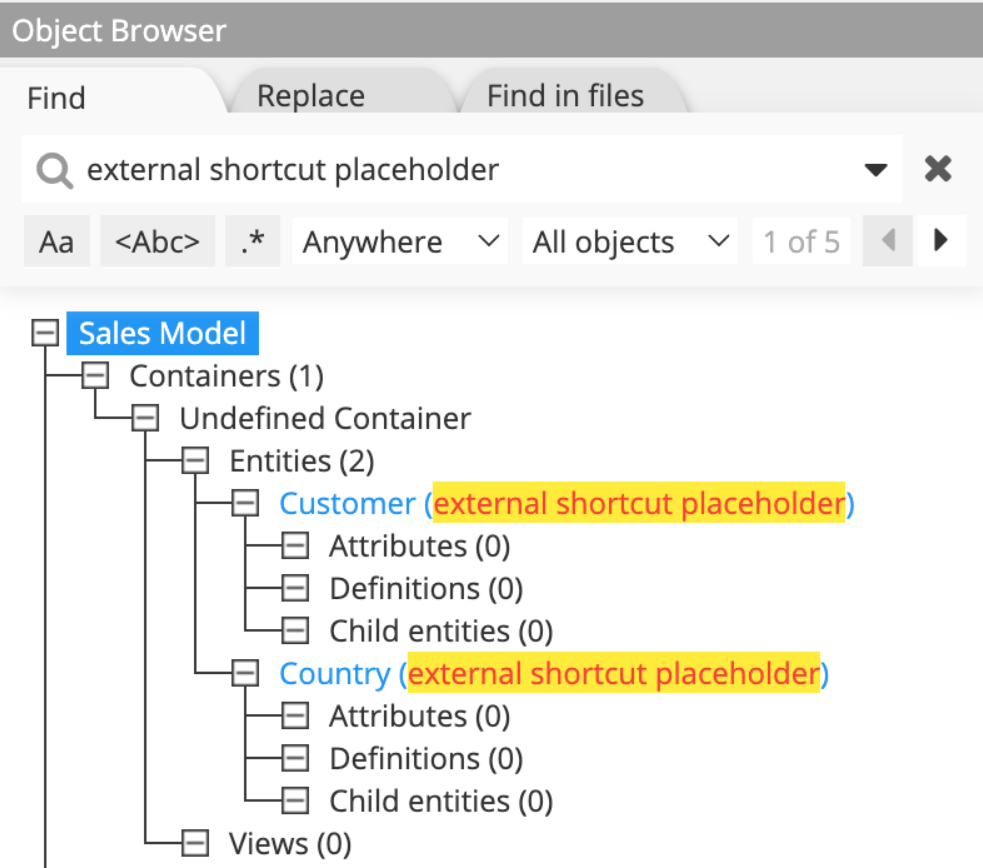
- their entity name is automatically suffixed with “(external shortcut placeholder)”
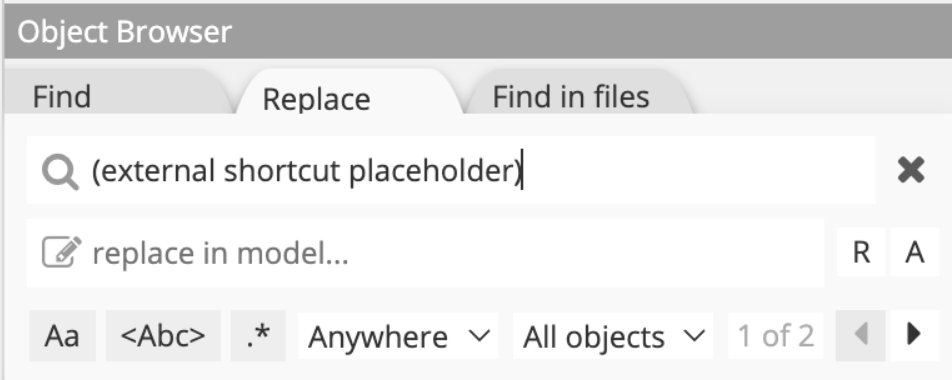
- in the Object Browser, they can be instantly located by searching for 'external shortcut placeholder'.

It is important to note that placeholder entities contain no attributes. This is by design: the attributes are initialized automatically once the placeholder references its external definition.
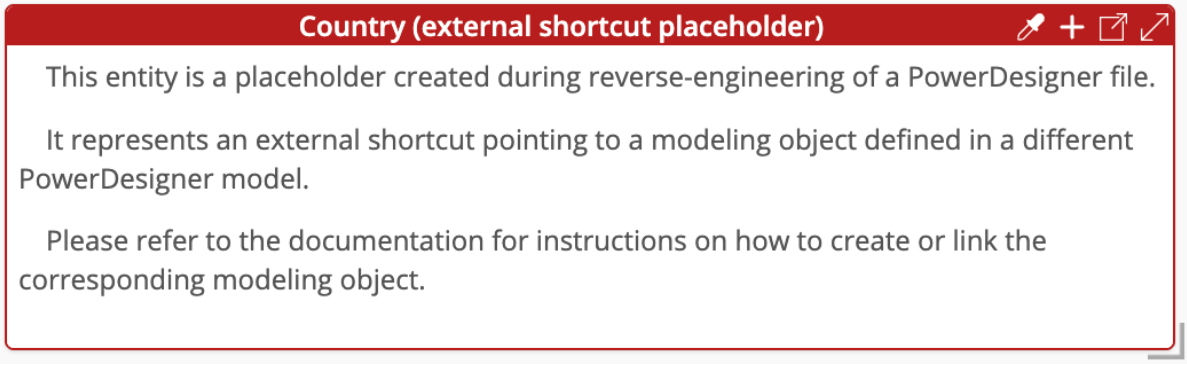
In addition, external shortcut placeholders are initialized with a dedicated description explaining their origin. This description can be displayed directly in the entity box by enabling Display options → Description in entity box. The description is temporary and is automatically removed once the external shortcut is reconnected to its definition, as described later in this documentation.
Recommended migration workflow
The recommended workflow consists of a clear and controlled sequence.
1. Reverse-engineer all PowerDesigner files independently, in any order. You may prefer to keep an organization in Studio that mirrors the original PowerDesigner structure, as this makes cross-model reconstruction easier. Or decide to take the opportunity to restructure your model storage. In either case, be aware of the consequences of moving models that are referenced by other models, which will typically break the paths, unless they are kept relative to each other.
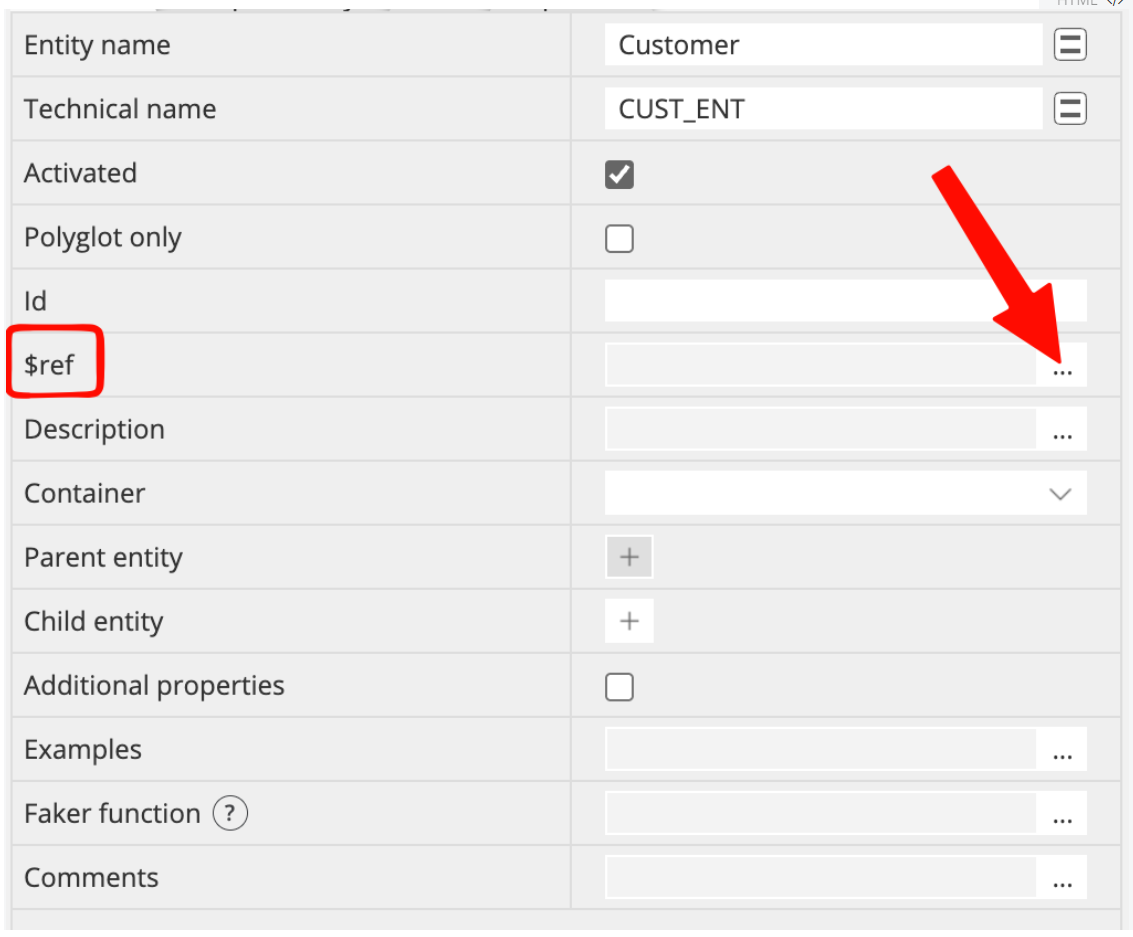
2. Create external references from each placeholder to the corresponding entity (external definition) in the appropriate Studio model. Once the reference is created, the placeholder is resolved and its attributes are populated from the external definition. This step relies on standard external reference functionality and is documented in detail here.
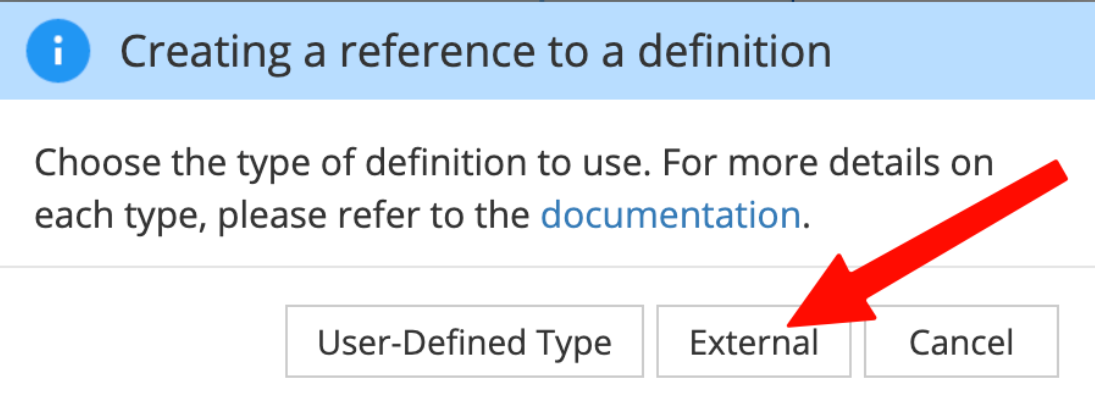
2.1. Via the Properties Pane of the entity placeholder:
2.2. Choose "External" and select the Studio model where the definition is modeled:
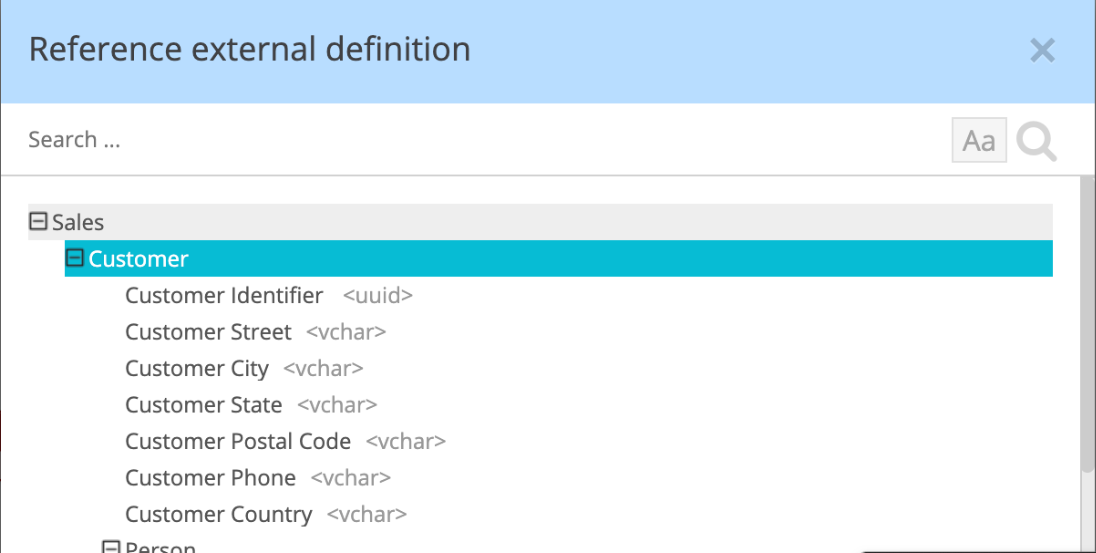
2.3. From this model, select the corresponding definition:
2.4. After applying the external reference, the placeholder entity is populated with the attributes from the selected definition:
3. Now that the attributes are available, relationships can be finalized. If the original relationship involved foreign keys, the corresponding attributes can be added to the relationship, via the properties pane.
4. Finally, the “external shortcut placeholder” suffix added to the entity name can be removed. This can be done manually, or efficiently in bulk using Find and Replace in the Object Browser, avoiding repetitive edits.
Which gives the desired result:
The user may also change the entity color if desired, for example to align it with the visual conventions used in the rest of the model.